
Vacuum casting is a process used to produce complex components by drawing a liquid material into a silicone mold using a vacuum. It is a cost-efficient option for making plastic components in low volume production compared to injection molding.
We will explore the basics of vacuum casting, including its pros and cons, areas of application, materials used, and recommended design practices.
What Is Vacuum Casting?
Vacuum casting, also known as polyurethane casting or urethane casting, utilizes silicone molds in creating plastic and rubber components. This manufacturing method is highly versatile and can imitate injection molding production to yield intricate parts in cast nylon and polyurethane resins.
Vacuum casting operates under vacuum conditions, producing top-notch castings devoid of bubbles and boasting a smooth texture without any flaws. This process can be highly beneficial in rapid prototyping projects or small-scale production runs and deserves consideration when selecting plastic or rubber parts rapid prototyping techniques.
How Does Vacuum Casting Work?
The process of vacuum casting resembles that of traditional injection molding in terms of requiring a mold tool with a cavity shaped like the intended part. The main difference lies in the materials used for the molds – while injection mold tools are typically made of metals such as steel or aluminum, vacuum casting employs soft silicone molds.
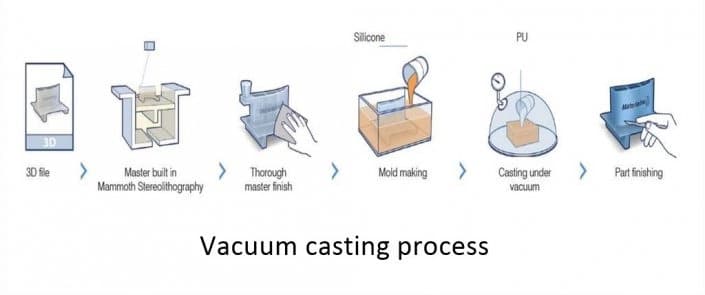
Step 1 – 3D Modeling
To begin the vacuum casting process, a 3D shape or geometry is first created through modeling. In order to achieve optimal results, injection molding principles must be followed. Sometimes, 3D laser scanning is used to inspect the pieces and create 3D files.
Step 2 – Master Pattern Building
A high quality master model is then created using the 3D model as a guide. While CNC machining was previously used for this purpose, additive manufacturing has become a quicker and more affordable option. Alternatively, an existing cast model can be used as the master pattern without any additional modifications.
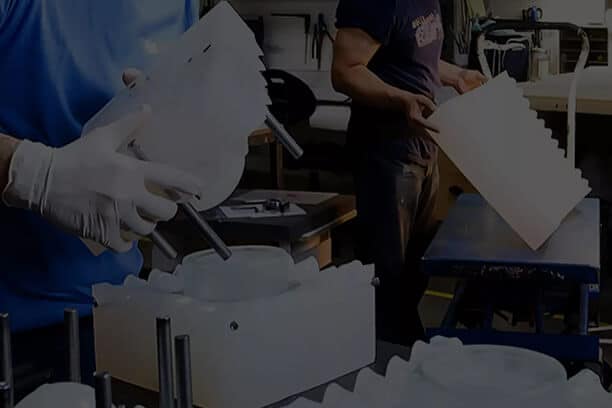
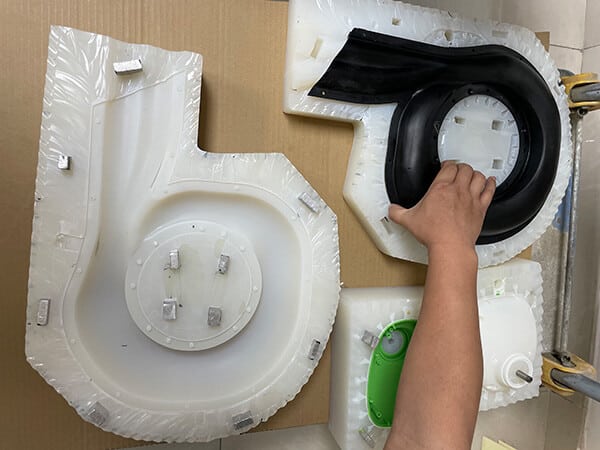
Step 3 – Silicone Mold Making
A silicone mold is created after the master pattern has been developed:
- Once the master pattern has been fitted with necessary components such as cores, inserts, and casting gates, it is put in a casting box and risers are added to ensure proper air escape during molding.
- Silicone is then poured and vacuumed around the master in the casting box, allowing it to fill every detail perfectly.
- After the mold has been left to cure inside the oven at around 40℃ for 8-16 hours, the box and risers are removed.
- Using a scalpel, the mold is cleanly split to reveal the negative shape cavity of the part, with a wavy cut to ensure accurate alignment when producing multiple parts.
- Lastly, it is important to select and use the best mold-release agent to prevent issues such as stickiness and surface defects.
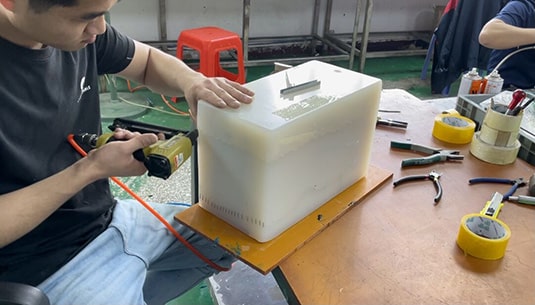
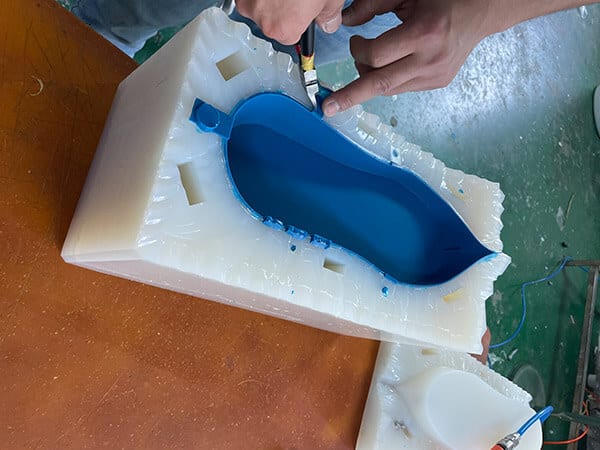
Step 4 – Casting Materials Mixture and Pour
Before mixing, polyurethane resins used for casting are typically heated to around 40°C. The mixing process involves combining a two-component casting resin in precise amounts, along with any desired pigment, inside a machine. Once mixed, the resin is poured into the machine’s bowl.
When the auto-pouring process begins, the casting resin and pigment mixture is thoroughly stirred and vacuumed for 50-60 seconds. Then, the resin is poured into the mold while still under vacuum pressure to avoid any air pockets or gaps, ensuring that the mold will be free of bubbles and that the resin will flow smoothly into the mold.
The vacuum states allow air pockets and other obstructions to be removed, enabling a smooth and flawless filling of the mold by gravity. This process helps to prevent any issues that could weaken the strength or appearance of the finished product.
Step 5 – Cast Parts Curing and Demolding
After casting the resin, the mold is subjected to a heating chamber to cure it. Subsequently, the casting is taken out of the mold, and the gate and risers are removed. Additional finishing is then performed.
Pros and Cons of Vacuum Casting
In this part, we will explore the advantages and limitations of the vacuum casting process.
Pros
Vacuum casting is advantageous in many terms:
1. Rapid prototyping: Vacuum casting allows for the fast creation of high-quality prototypes with intricate and delicate shapes in small batches. Thus, it’s commonly used for low-volume and short-run production of prototypes or production parts.
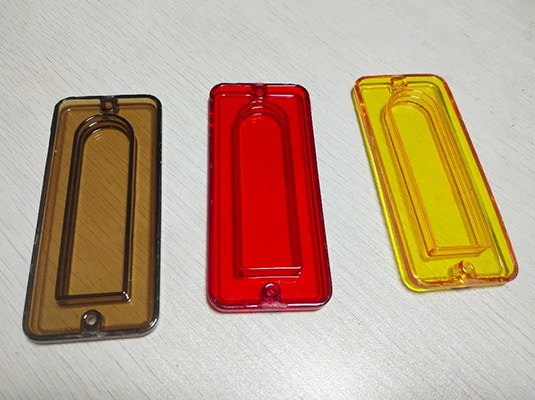
2. Material and design flexibility: Vacuum casting resins come in a diverse range of colors, making them convenient for different applications. With the flexibility of 3D printing geometry, vacuum casting can produce parts that would typically be difficult or impossible to create using other manufacturing methods.
3. High precision and low costs: Compared to other rapid prototyping methods like CNC machining, vacuum casting is a cost-effective option that involves producing a reusable mold in just a few hours. Additionally, parts produced using vacuum casting fit together seamlessly and do not require additional steps like sanding or drilling.
4. Fine details for the finished parts: The vacuum casting process offers the benefit of creating components with precise details as it employs a mold formed by a 3D printed master model. 3D printing enables intricate details to be precisely captured and transferred to the final cast.
Cons
Before embarking on a project using the vacuum casting process, it is important to keep in mind that there are some limitations to this method:
1. Tool wear and tear: Vacuum casting involves using molds made of silicone, which has a shorter lifespan than metal molds used in injection molding. Consequently, tool wear and tear is common.
2. Limited production volume: Also, the amount and size of molds in vacuum casting are limited, making it more suitable for small-scale production as opposed to mass production.
3. Irregularities caused by shrinkage: As with injection molding, shrinkage (typically 0.25% – 15% due to thermal expansion) can cause irregularities in the features of the final product, such as overly thin or thick parts, and deviations from normal tolerance levels.
4. Maintenance and clearance: In vacuum casting, it is crucial to clean molds regularly to prevent residue and off-marks on subsequent casts.
5. High initial cost of setup: Although vacuum casting has a low production cost, the setup cost can be high depending on the necessary tools and equipment.
6. Limit for internal feature processing: The surface finish of vacuum-cast parts often depends on post-processing and may be limited to the exterior as some internal features of the pattern can be difficult to access.
Materials Available for Vacuum Casting
Polyurethane, a type of thermoset material, is recognized for its robustness, longevity, ability to resist wear and tear, and adaptability. Various forms of urethane can imitate the features of different thermoplastics. For instance, a rigid urethane cast part can resemble polycarbonate, while a more flexible plastic can bear similarities to polypropylene.
Rigid Polyurethane
- Soft rigid resins provide a durometer range of 60-75 Shore D, and they are ideal for creating firm but flexible parts, such as gaskets and seals.
- ABS-like polyurethanes are affordable and versatile resins that offer strength comparable to ABS thermoplastic polymer. With a durometer of 80-85 Shore D, they make excellent product enclosures.
- Acrylic-like polyurethanes have a clear and transparent appearance, similar to acrylic. They offer a durometer of around 87 Shore D and have excellent durability, making them a great choice for parts like light tubing.
It should be noted that UV radiation has an impact on urethane, so its use in outdoor applications should be carefully considered. However, this issue can be resolved by applying appropriate coatings to protect against UV damage.
Elastomeric Polyurethanes
Elastomeric polyurethanes provide flexible, rubber-like attributes that are on par with those of TPU, TPE, and silicone rubber, making them well-suited for use in the production of wearable devices. These materials boast a durometer between 50-80 Shore A and are known for their strength and resilience.
The hard elastomeric urethane materials are a different class of materials, which range in durometer from 90 Shore A to 60 Shore D. With a focus on industrial-grade applications, these materials are useful for creating gears and forming dies.
Applications of Vacuum Casting
The process of vacuum casting finds its utility in various industries owing to its versatility. Its capability to produce intricate and accurate components makes it a desirable option for delivering excellent outcomes.
Aerospace Industry
Vacuum casting can successfully fabricate precision aerospace components, including fuel systems, air ducts, and parts of airplanes’ exteriors due to its accuracy, repeatability, and ability to deal with complicated details.
Medical Industry
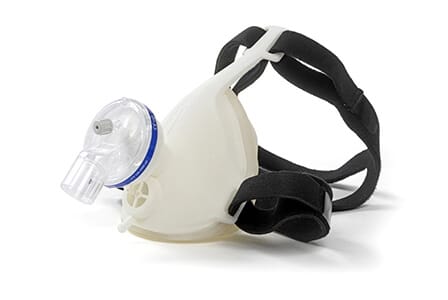
Vacuum casting is ideal for creating complicated parts and components in the medical sector, such as medical implants and prosthetics.
Automotive Industry
Highly detailed automobile components such as intake manifolds, exhaust systems, and body panels can benefit from the precision and consistency of silicone vacuum casting for the automotive industry.
Food and Beverages Industry
The food and beverage industry often employs vacuum casting to produce food packaging, containers, cans, mugs, bottles, glasses, and other essential items in food production facilities.
Electronic Industry
Polyurethanes’ shock and heat resistance make vacuum casting preferable for making electronic device housings.
Consumer Goods Manufacturing
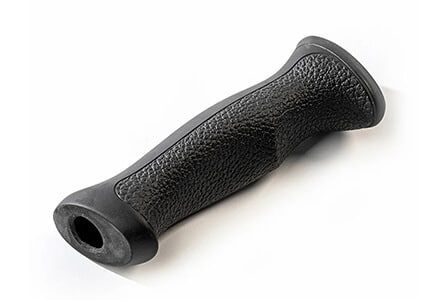
Consumer goods, like toys and sporting equipment, can be perfectly manufactured through the vacuum casting process and fit into application use.
Vacuum Casting vs. Injection Molding
It’s crucial to consider several factors such as tolerance demands, volume needs, surface finish requirements, and lead time when determining a machining process. The vacuum casting process is ideal for producing low-volume production runs with smooth surface finishes and close tolerance. In contrast, injection molding is well-suited for high-volume production runs with less demanding tolerance requirements.
Vacuum Casting vs. 3D Printing
The advantage of using vacuum casting is that it can produce parts with intricate details and smooth surfaces, though it can be a time-consuming process, particularly when creating multiple copies. Comparatively, 3D printing builds parts layer by layer utilizing liquid plastic or powder material. With 3D printing, one of the biggest benefits is its efficiency- it takes much less time than vacuum casting.
If your primary concerns are affordability and time, then 3D printing is likely the superior option. If details and accuracy are essential for your project, however, then vacuum casting is the preferable choice.
Five Design Tips for Vacuum Casting
In order to achieve maximum efficiency in the manufacturing process, it is crucial that product teams prioritize designing for manufacturability and optimizing mold design at the early stages. This will help to streamline production and minimize costs. To create high-quality custom cast urethane parts, we recommend these five key design tips for a clean and functional end result:
1. Designing Uniform Wall Thickness
Some engineers favor vacuum casting over injection molding since it allows for greater options in terms of wall thickness, but it’s still necessary to have a consistent wall thickness in a urethane mold design. Maintaining uniform walls will reduce the likelihood of deformation during the curing process, make sure that the mold is filled fully and precisely, and minimize other design problems.
Generally, a minimum wall thickness of .040” (1mm) is recommended, but in some instances, such as for small parts, walls may be as thin as .020”(.5mm). For larger parts, it’s crucial to proportionally increase wall thickness according to the size of the part to ensure that adequate support is provided.
2. Minimizing Shrinkage
Shrinkage can occur in cases where a urethane mold design involves walls of different thicknesses intersecting. This happens as thicker walls solidify at a slower rate than their thinner counterparts, leading to a decrease in size at the point where they attach to the nominal wall. To avoid such shrinkage and the resultant sunken area in the nominal wall, engineers need to ensure rib thickness is between 50% and 60% of the walls to which they are attached.
However, at times, vacuum cast parts may shrink due to reasons other than a flaw in the urethane mold design. Factors like part geometry, the accuracy of the mold and master pattern, and materials used in urethane casting affect final dimensions. A shrinkage rate of 0.15% is usually acceptable, but engineers need to recheck the mold design if the shrink rate goes beyond this threshold.
3. Employing Ribs
The addition of ribs to a urethane mold design can enhance the strength and rigidity of the final product without an increase in its thickness. Engineers are supposed to follow certain guidelines to use ribs properly:
- Height
Longer ribs offer greater reinforcement, while molding a long rib can make the part challenging. It is recommended that the height of the rib should not be more than three times its thickness. Instead of a long rib, multiple short ribs can be used to increase the stiffness of the part. - Width
The width of the rib at the area where it intersects with the part must be 40% to 60% of the thickness of the part. If a fillet radius feature is included in the design, it should constitute at least 25% of the thickness of the part. These parameters are necessary to make the rib as durable as possible. - Draft Angle
In order to decrease the likelihood of sinking, engineers are required to create a rib design. The recommended draft angles for each side are between 0.25 and 0.5 degrees, and they should be kept equal. Additionally, for surfaces that are textured, an extra draft angle of 1.0 degree should be added for every 0.025 inches (0.001 inch) of texture. - Spacing
To ensure that the weight of the part is evenly distributed across all ribs, engineers should set each consecutive rib at a distance of at least two times the thickness of the rib. - Orientation
Engineers should carefully arrange ribs to maximize a part’s bending stiffness, as improper rib orientation has no positive impact on strength.
Product teams should pay attention to sinking and intersections when using ribs, using fillets, and lightweight to reduce stress and maintain wall thickness.
Ribs enhance a part’s performance, but only when extra reinforcement is necessary. Unnecessary ribs will increase weight, cost, molding issues, and material waste. Considerations must be made when determining if a urethane mold design requires ribs.
4. Incorporating Drafts and Undercuts
Vacuum casting doesn’t pose any issues with drafts and undercuts as liquid silicone can adapt to any mold shape. However, if an engineer intends to use this process for prototyping but eventually switches to a different process, it’s advisable to ensure the design reflects the end-use production requirements, including drafts and undercuts. Although longer zero-draft features might result in part breakage during extraction from the mold, incorporating a slight angle could mitigate such risks, particularly during mass production.
5. Ensuring Enough Spacing for Molded Letters and Logos
The process of vacuum casting allows designers to create custom cast urethane parts with molded raised or recessed letters and logos of high quality. Designers should keep in mind several factors such as feature width and depth, radii, and space between features to ensure that the letters are readable and aesthetically pleasing.
When designing custom cast urethane parts, the recommended minimum distance between features is 0.050”, although this may vary from the design. Radii should be at least half the feature height, but larger radii are preferred. Furthermore, logos and letters should have a width that is twice their height for optimal results.

Conclusion
To stay ahead of competitors, it’s important to use advanced manufacturing technologies when developing new products. Vacuum casting or urethane casting is a technology that allows for rapid prototyping, market testing, and seamless production processes without sacrificing product quality. We hope this article can help you have a basic understanding of the fundamentals of this manufacturing process.
Get Vacuum Cast Parts at Runsom Precision
Runsom Precision, an experienced manufacturing partner, can help simplify designing for manufacturability. We specialize in developing products using the latest digital design technologies, even those thought impossible to make. Our design team’s extensive experience in manufacturing processes can benefit product developers looking to optimize their urethane mold designs or develop breakthrough applications.
Request an instant quote to get started on your custom cast urethane parts.
Other Articles You May be Interested in: