1. Concept of section view
Suppose that a part is cut to expose the section cutting plane, the part between the observer and the section cutting plane is removed, and the figure obtained by projecting the rest to the projection plane is called the section view.
According to the national standard, dotted lines shall not be used to express the outline and edge lines of the machine parts to a great extent. The invisible structures on the machine parts can become visible on the section view, and be expressed with solid lines, so that they are clearer.
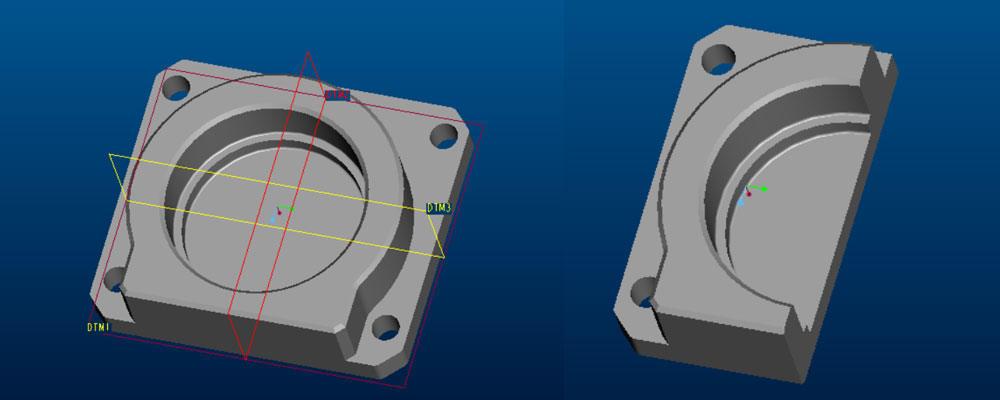
2.Drawing methods of section view
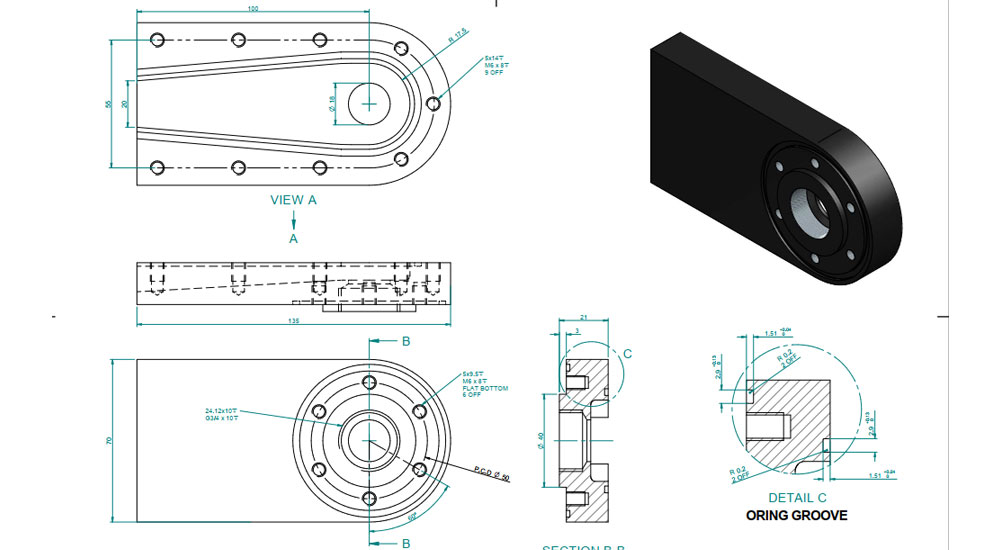
- Determine the position of the section cutting plane
The position of the cutting plane shall generally pass through the axis or symmetry plane of internal structures of the part such as holes and grooves. - Draw the section area cut;
- Draw the visible contour line behind the section cutting plane.
- The cut or section symbol shall be drawn in the areas on cuts and sections to indicate the material of the part, and other views shall be drawn.
① The purpose of the section view is to express the hierarchy of a part more clearly. The dotted contour line of the structure that has been expressed clearly is no longer drawn in each view.
② The section view only assumes that a view is cut open, so the section view of a view does not affect the integrity of other views. Other views shall still be drawn completely - Annotation of section view
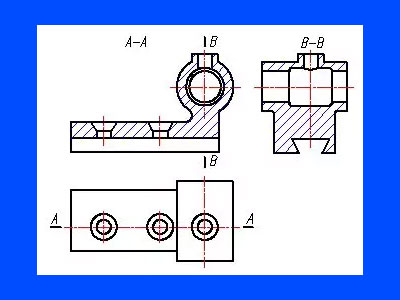
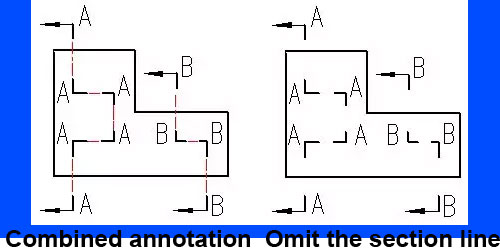
Generally, the title of the section view “× – ×” (× is a capital Latin letter or Arabic numeral, such as “A-A”) shall be indicated on the top of the section view. On the corresponding view, the start, end and turning points of the cutting position are indicated with the cutting symbol (drawing thick and short lines), the projection direction is indicated with an arrow, and the same letter, such as “A”, is indicated. The cutting symbol does not intersect with the contour line to a great extent. If the section view is drawn based on the projection relationship and not separated by other views in the middle, the arrow may be omitted
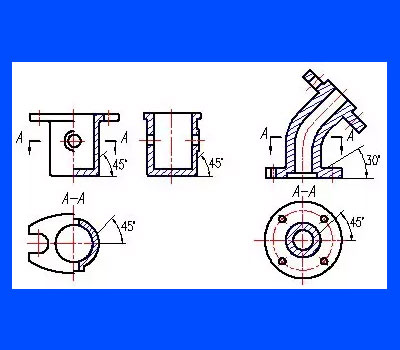
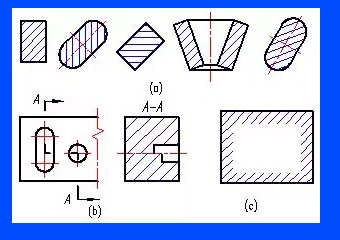
When the section cutting plane passes through the symmetry plane or basic symmetry plane of the part, and the section view is drawn based on the projection relationship and not separated by other views in the middle, the annotation may be omitted. For example, in the left view in Figure (a), the annotation is omitted in the full section view.
It shall also be noted that the inclination directions of the section lines of the same part shall be identical and the interval shall be equal. If the main contour line in the view is 45 ° or close to 45 ° with the horizontal, the section line in the view shall be 30 ° or 60 ° with the horizontal, as shown in Figure (b).
The combined annotation of section symbol, section line and letter is shown in the figure. The section line may also be omitted, as shown in the figure. - Representation of areas on cuts and sections (GB/T 17453-1998)
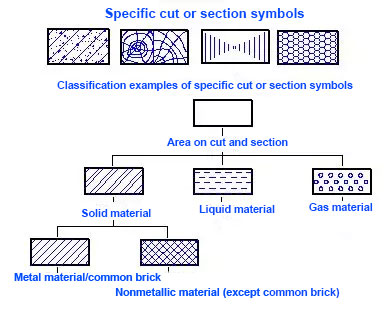
The cut or section symbol (also called hatching) varies with the type of material used.
If it is not necessary to represent the material category in the areas on cuts and sections, it can be represented by general hatching. Hatching shall be done with the narrow continuous lines and at a convenient angle (preferably 45 °) to the principal outlines or lines of symmetry of cuts or sections.
Separate areas of a cut or section of the same part shall be hatched in an identical manner (same direction and spacing) (see Figure (a)).
Where cuts or sections of the same part in parallel are shown side by side, the hatching shall be identical (see Figure (b)), but may be offset along the diving line between the cuts or sections for greater clarity
In the case of a large area, the hatching may be limited to a zone that follows the contour of the area (see Figure (c)). - Representation of specific materials
If it is necessary to indicate the material category in the areas on cuts and sections, a specific cut or section symbol shall be used (see GB/T 17452). The specific cut or section symbols are determined according to corresponding standards. The classification examples of specific cut or section symbols are shown in Appendix A (informative).
The considerations below shall be noticed for drawing the section view:
1) Generally, the cutting plane shall pass through the plane of symmetry or axis of the part to avoid incomplete structure.
2) Because the cutting is imaginary, the other views shall be drawn completely after a section view is taken.
3) In order to make the graphics clearer, unnecessary dotted lines shall be omitted in the section view. For example, the dotted line in Figure (a) can be omitted and drawn as shown in Figure (b). However, if drawing a dotted line is helpful for interpreting the drawing, it can also be drawn, as shown in Figure (c);
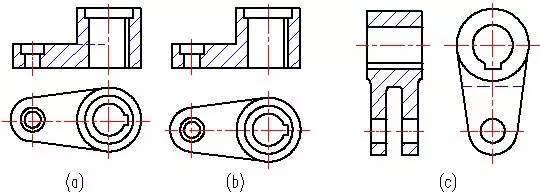
4) The structure shape of the cut hole and groove shall be carefully analyzed to avoid mistakes and omissions.
Don’t omit the projection-coincidence nature of plane edge view or the intersecting line. More projection, more or less line segments, and the section views of different structures are not permitted.

